AWS EC2 F2 FPGA Runtime AMI Builder#
After creating an Amazon FPGA Image (AFI), we suggest creating a runtime AMI using the Runtime AMI Builder (RAB). This tool was created to design an AMI to pair with specific accelerated application’s needs. Use of the RAB offers the following benefits:
Reduced storage costs
Smaller base image with reduced root-volume storage capacity
A Production-ready environment
Install only what’s needed to run a production accelerator design and host application
Flexibility and Extensibility
Create components to install or use any software not included with the FPGA Developer Kit
Customizable deployment
Automatically share runtime AMIs with AWS accounts in any region F2 instances are available
The RAB makes creating a runtime AMI for individual applications convenient by simplifying the use of the AWS CDK to create EC2 Image Builder pipelines. This guide demonstrates using the RAB on the FPGA Developer AMI to build a runtime AMI with the following tools installed:
Python 3.12 (Rocky Linux only)
The AWS CLI
The AWS FPGA SDK (SDK)
Runtime utilities for performance optimization
Vivado Lab Edition (VLE)
The Xilinx Virtual Cable driver (XVC)
Table of Contents#
What is the AWS CDK?#
The Runtime AMI Builder uses the AWS Cloud Development Kit (CDK), which is a framework for defining cloud infrastructure as code through familiar programming languages. No prior knowledge about the CDK is needed to use this tool, but a basic understanding of these concepts will help:
CDK converts the RAB’s TypeScript code into AWS CloudFormation templates
CloudFormation is AWS’s service for creating and managing cloud resources
Bootstrapping sets up the necessary CDK infrastructure in the deploying AWS account (one-time setup)
Synthesizing shows what resources will be created without actually creating them
Deploying creates the actual Image Builder pipeline and related resources
To use the RAB, only three core files need to be edited to create a runtime AMI build configuration. After that, only two commands are needed to deploy the EC2 Image Builder pipeline.
What Does Using the Runtime AMI Builder Cost?#
The EC2 Image Builder is offered at no cost, other than the cost of the underlying AWS resources used to create, store, and share the images. This means that the Image Builder pipeline and CloudFormation stack cost nothing to use or deploy.
Running Individual Installation Scripts Locally#
Before cloning the FPGA Developer Kit onto either base AMI,
install git. After the FPGA Developer Kit is cloned onto
the base AMI, the installation scripts used by the RAB may
be executed individually on the base AMI. This is greatly
reduces iteration time before setting up an EC2 Image
Builder pipeline. If all components are being installed via
local execution of the installer scripts, they must be run
in this order to satisfy tool and package dependencies:
sdk_setup.sh (must be sourced)
Refer to each script to see any necessary flags and arguments.
install_xilinx_virtual_cable.sh emits an error if ran on a compute instance. If “XVC PCIe driver installation complete!” is emitted when ran, this error can be ignored.
AWS Account IAM Role Setup for Runtime AMI Builder Use#
The RAB requires access to an AWS account’s resources via an IAM role. To create an IAM role with the necessary permissions, follow these steps:
In a browser, navigate to the AWS EC2 Console
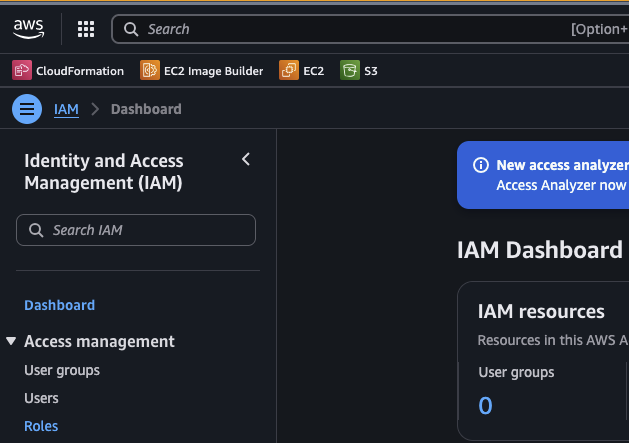
In the search bar, search for “IAM” and click on it in the search results

On the IAM console, click “Roles” on the left side of the console

On the Roles screen, click “Create role” in the top right corner of the console

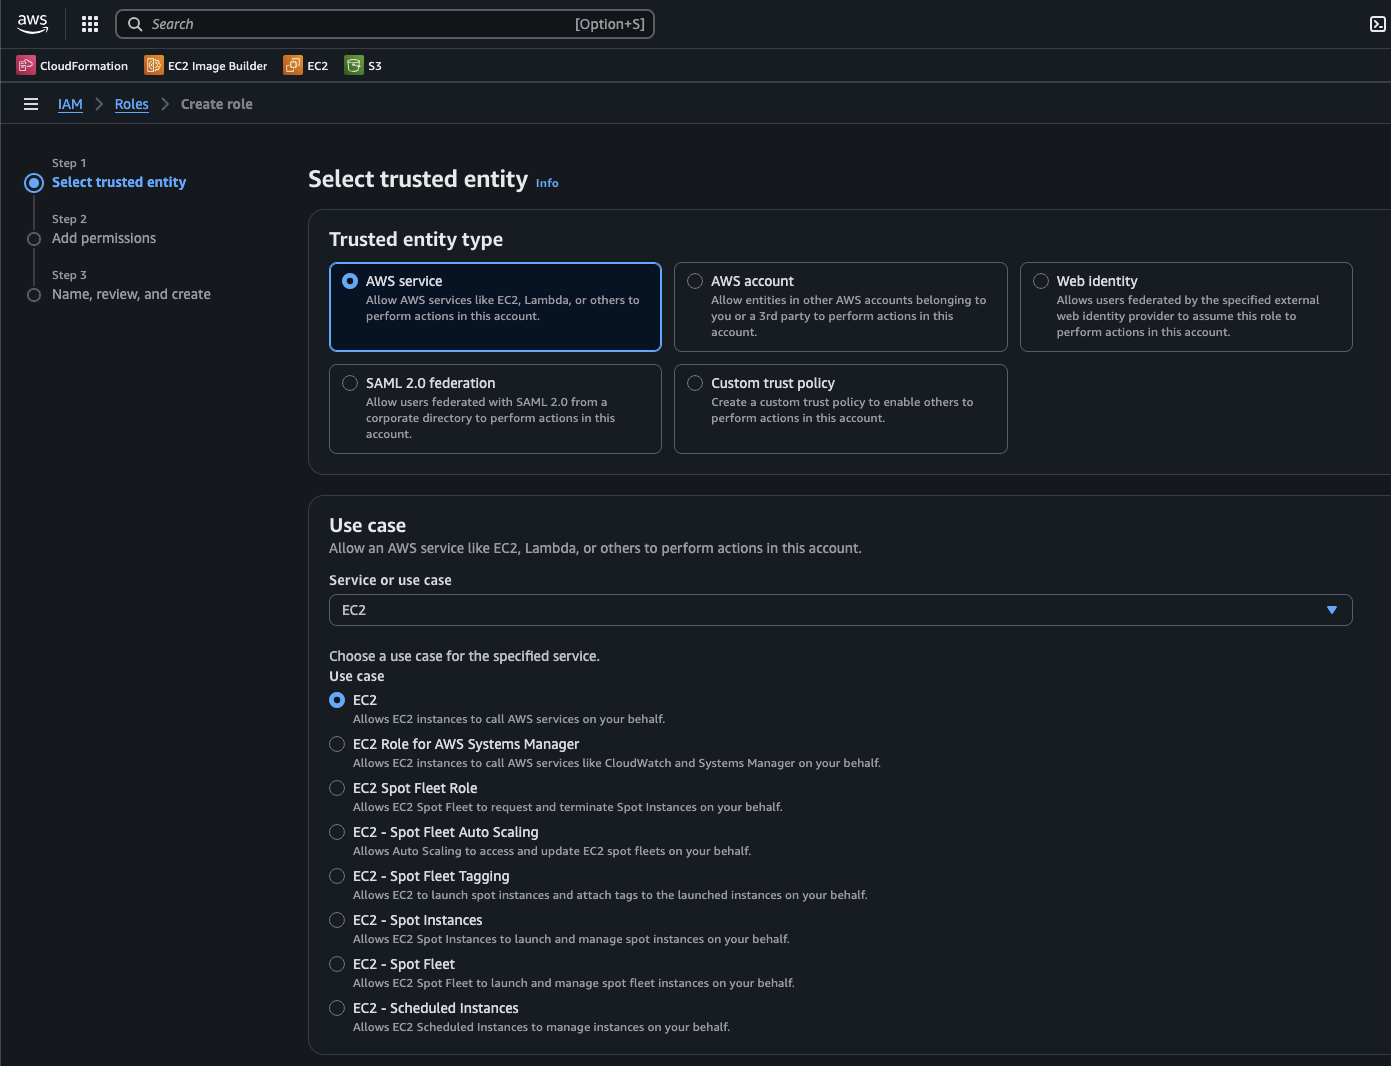
Under “Select trusted entity”, select “AWS service” as the “Trusted entity type”
Under “Use case” select “EC2”
On the choice selection that appears, use “EC2”

Click the “Next” button
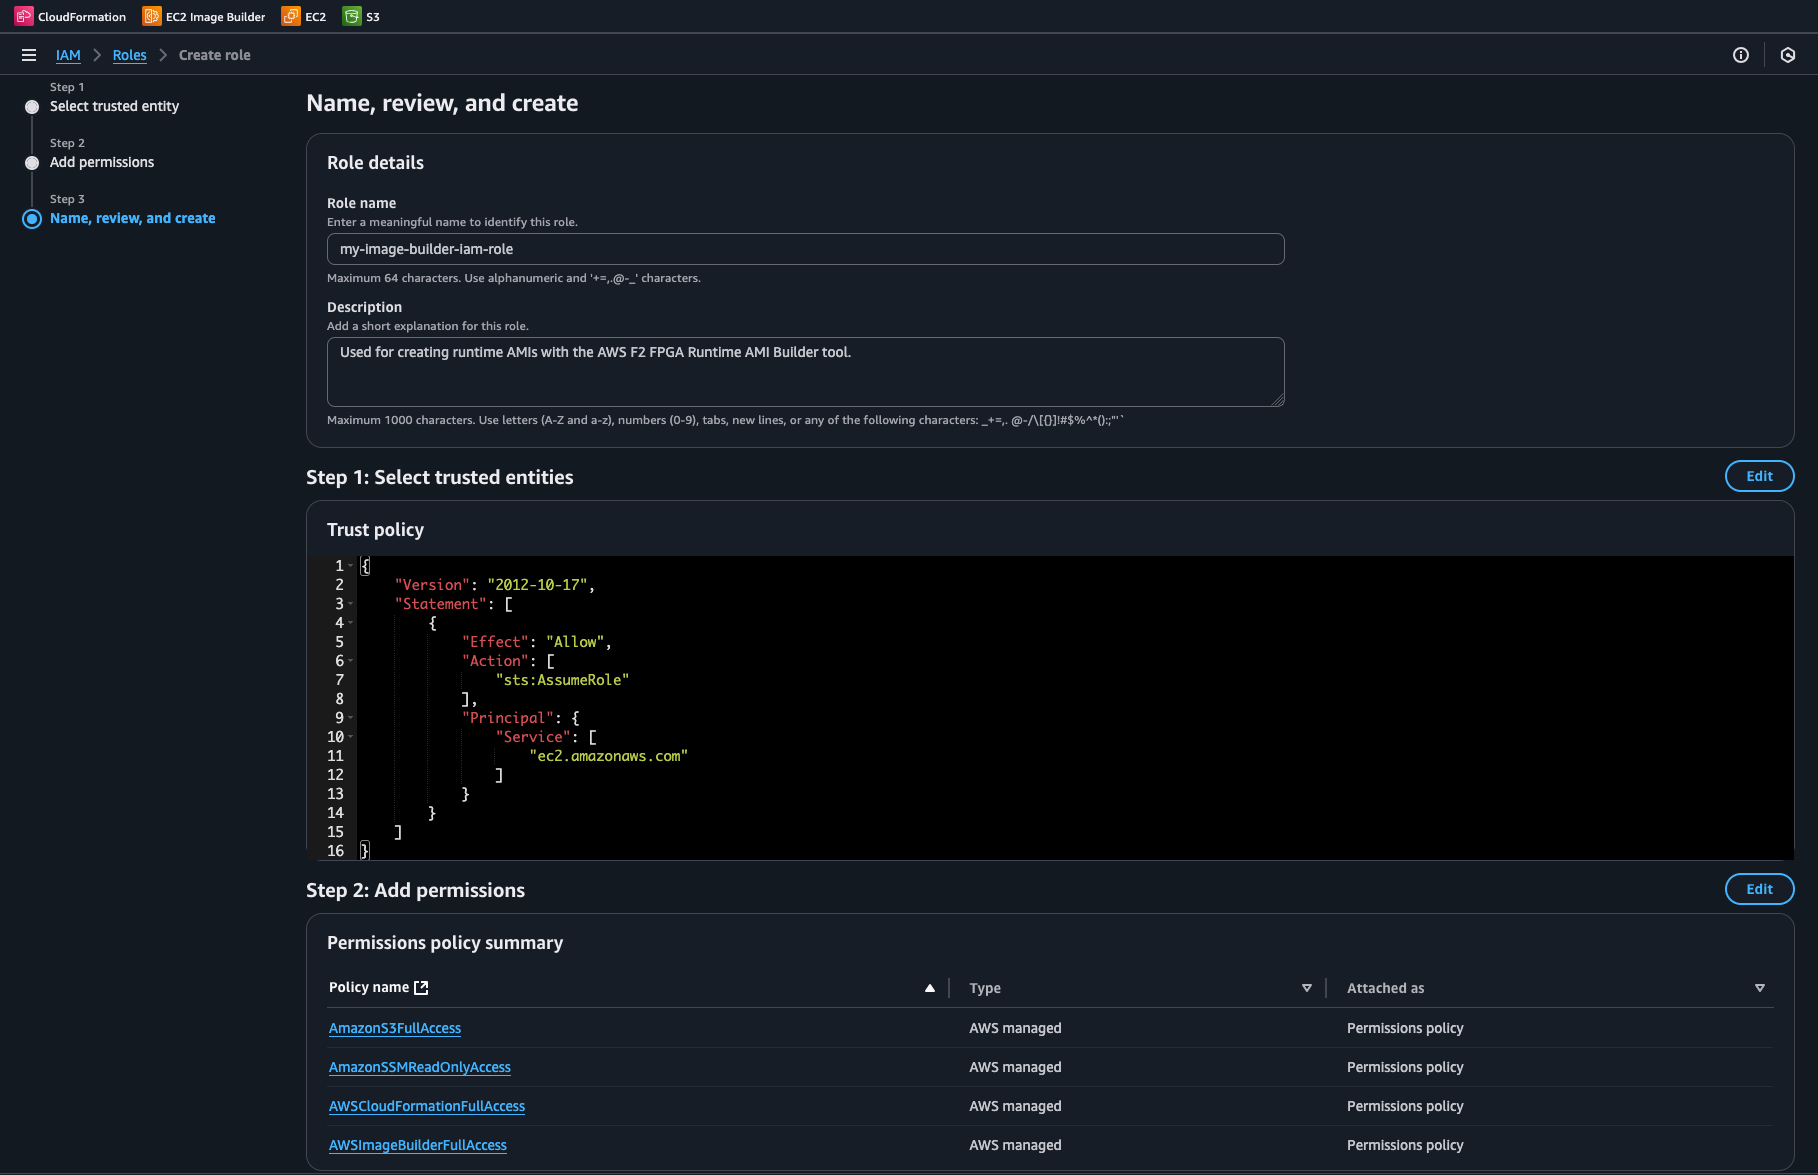
On the “Add permissions” screen, add the following managed policies:
AmazonS3FullAccess
AmazonSSMReadOnlyAccess
AWSCloudFormationFullAccess
AWSImageBuilderFullAccess
⚠️ Security Best Practice: These managed policies grant broad permissions for ease of setup. After becoming comfortable with the RAB, we recommend creating custom policies that limit access to specific resources (e.g., only the CDK bootstrap bucket for S3, only RuntimeAMI* resources for Image Builder). See AWS IAM Best Practices for guidance on implementing least-privilege access.
Under “Name, review, create”, give the role a name and description that associates it with building runtime AMIs
In the “Step 1: Select trusted entities” form, no edits are necessary when using the permissions above

Now click “Create role”
Search for the newly created role in the IAM console and open its details page
Click the “Add permissions” dropdown and select “Create inline policy”

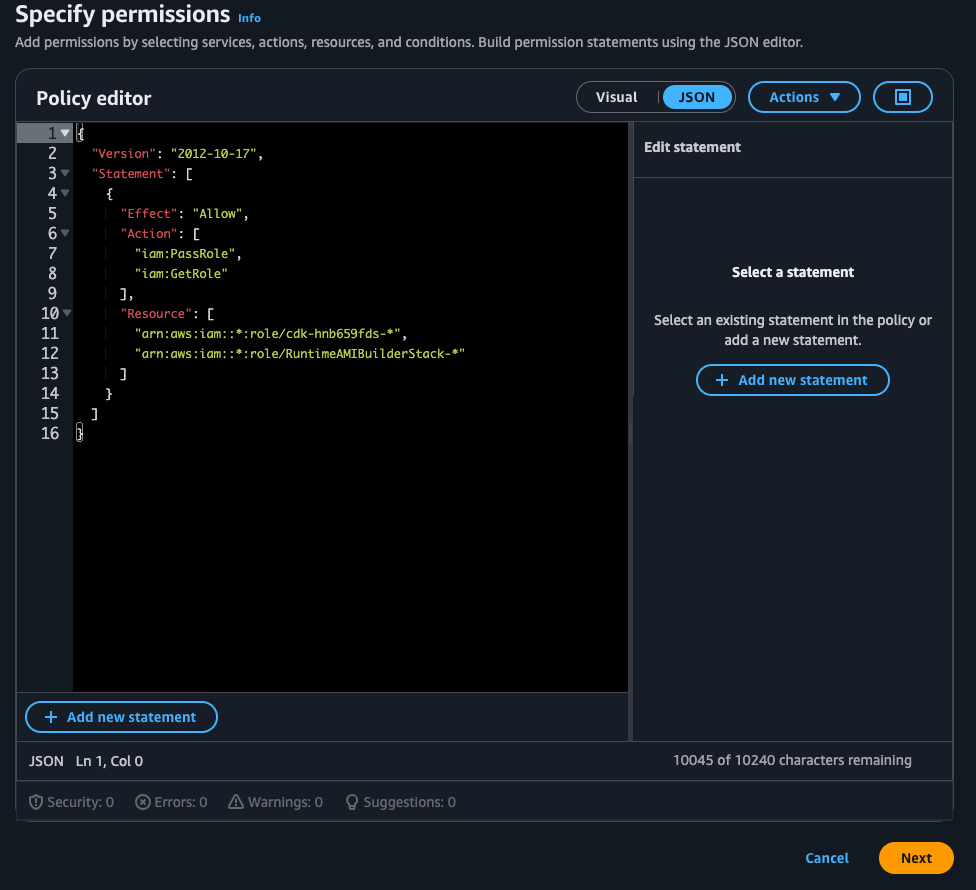
In the JSON editor, paste the policy below and give it an identifiable name, then click “Next”
{
  "Version": "2012-10-17",
  "Statement": [
    {
      "Effect": "Allow",
      "Action": [
        "iam:PassRole",
        "iam:GetRole"
      ],
      "Resource": [
        "arn:aws:iam::*:role/cdk-hnb659fds-*",
        "arn:aws:iam::*:role/RuntimeAMIBuilderStack-*"
      ]
    }
  ]
}

Finally, verify the created role by checking that it has the 4 permissions and another based on the policy above
Using the Runtime AMI Builder IAM Role#
When running the RAB on an AWS EC2 Instance, make sure to attach the created IAM role under the “Advanced details” section in the Launch Instances interface.

If the instance is already launched, the IAM role can be attached to it retroactively. On the EC2 Instances screen, select modify IAM role under Actions -> Security.

At this point the RAB is ready to run after SSHing onto the instance.
Installing Node.js#
The AWS CDK depends on Node.js to function. More information about
supported versions is available
here.
To install Node.js, visit the download
page and choose a version. This
guide uses Linux as the platform, nvm as the Node.js version
manager, and npm as the package manager.
Installing AWS CDK Dependencies#
After installing Node.js, source the setup script to install the CDK and its dependencies and perform any necessary security updates for those npm packages:
cd $path_to_fpga_developer_kit/developer_resources/runtime_ami_builder
. runtime_ami_builder_setup.sh
This will also set the RAB_DIR environment variable which is used
later on in this guide.
Customizing the Runtime AMI Build#
Configuration and Resource Deployment#
The RAB can be configured via the context section of
lib/cdk.jsonc. In this section are all of the
values that can be adjusted to create a runtime AMI, along with
descriptions of what they do. These context values also allow
configuration of the region where the CloudFormation and EC2 Image
Builder pipeline the CDK creates are deployed.
Unless mentioned otherwise, all configuration discussed will take place in lib/cdk.jsonc.
Choosing a Base AMI#
Two default base AMIs are available: Rocky Linux 8.10 and
Ubuntu 24.04. The AMI configurations are defined in
lib/types.ts using their AMI IDs for us-east-1.
To add and use a different base AMI, modify BASE_AMI_CONFIGS in
lib/types.ts to include the new AMI’s ID and
configuration details. We recommend choosing an AMI without a product
code attached to it. To find an AMI that without a product code, use the
following command:
aws ec2 describe-images --filters "Name=name, Values=*OS_NAME_GOES_HERE*" --query 'Images[].[ImageId,Name,CreationDate,ProductCodes[0].ProductCodeId || `null`]' --output table | grep None
The *s to each side of the OS name are standard wild-card
characters and will help yield the most results for the OS of interest.
The AMI used as the base for the runtime AMI must exist in the region the CDK resources are deployed in.
Versioning the Image Recipe#
Image recipe versioning, as the name suggests, provides version control over image builder pipelines and components. The image recipe version must be incremented between changes to any of the files used by the RAB.
Choosing a Vivado Lab Edition Tool Version#
The two default base AMIs are supported by Vivado Lab Edition 2025.1. Other supported versions will be listed in supported_vivado_lab_edition_versions.txt when they are added to the RAB.
If Vivado Lab Edition is not required, remove the
installVivadoLabEdition component from componentConfigs in
lib/runtimeAmiBuilder.ts.
Sizing AMI Storage#
Fine-tuning the storage capacity of the runtime AMI is done here. Root volume storage sizing provides precise storage cost control.
Auto-Sharing with Other AWS Accounts#
Add any AWS accounts to be granted launch permissions for the runtime
AMI. This does not grant the target accounts ownership of it. If no
other accounts need to be granted launch permissions, set this value to
[].
Auto-Sharing in Specific Regions#
Distribution of the runtime AMI to the regions specified is handled
automatically as part of the EC2 Image Builder pipeline. This makes the
runtime AMI available in the specified regions for only the deploying
account and the accounts granted launch permissions above. If the
runtime AMI is not needed in regions other than the deployment one, set
the value to [].
Selecting a Build Instance Type#
The instance type and size chosen will affect the speed of the runtime AMI build. Instance type pricing can be seen here.
Customizing AMI Info#
The AMI’s name, unique identifier, description, and tags may all be configured as well.
Spaces aren’t allowed in the unique identifier field.
Selecting Components to Use in the Runtime AMI#
Edit the componentConfigs list in
lib/runtimeAmiBuilder.ts to choose
which components will be installed on the runtime AMI.
Bootstrapping, Deploying, and Running the Image Builder Pipeline#
If the Runtime AMI Builder IAM role has not yet been attached to the EC2 instance, this must be done before proceeding.
The EC2 Image Builder Pipeline is now ready for deployment. The
following commands should be run from within
aws-fpga/developer_resources/runtime_ami_builder/lib:
Bootstrap the CDK (First Deployment Only)#
First, generate the CDK configuration from cdk.jsonc. This can be done from anywhere within developer_resources/runtime_ami_builder:
npx ts-node $RAB_DIR/scripts/buildConfig.ts
This converts the cdk.jsonc configuration into the standard
cdk.json format that the CDK CLI expects. If cdk.jsonc or any of
the files mentioned above have been edited, the image recipe version
must be incremented. After the edit is made, re-run this command to
ensure the changes will take effect.
Now the CDK can be bootstrapped:
cdk bootstrap
This sets up the necessary AWS infrastructure (S3 bucket, AMI distribution IAM roles, etc.) the CDK needs to deploy its resources. This is command only needs to be run once per AWS account/deployment-region combination.
On successful bootstrap,
✅ Environment aws://<deploying_aws_account_number_here>/<configured_deployment_region_here> bootstrapped
will be printed to the console.
Verify the Settings#
cdk synth emits a long-form display of all of the components,
parameters, and distributions the runtime AMI will be built with and
process.
cdk synth
It’s especially useful for verifying that AMI launch permissions will be granted as expected:
MyRuntimeAmiDistributionConfig:
  Type: AWS::ImageBuilder::DistributionConfiguration
  Properties:
    Distributions:
      - AmiDistributionConfiguration:
          name: f2-runtime-ami-{{imagebuilder:buildDate}}
          description: F2 FPGA Runtime AMI - {{imagebuilder:buildDate}}
          amiTags:
            Project: AWS-FPGA-F2
            Environment: Production
            ManagedBy: ImageBuilder
          launchPermissionConfiguration:
            userIds:
              - "012345678901"
        Region: us-east-1
      - AmiDistributionConfiguration:
          name: f2-runtime-ami-{{imagebuilder:buildDate}}
          description: F2 FPGA Runtime AMI - {{imagebuilder:buildDate}}
          amiTags:
            Project: AWS-FPGA-F2
            Environment: Production
            ManagedBy: ImageBuilder
          launchPermissionConfiguration:
            userIds:
              - "012345678901"
        Region: us-west-2
Here, the AMI is being shared with the AWS account 012345678901 and
is also being distributed to regions us-east-1 and us-west-2.
Deploy the Image Builder Pipeline#
cdk deploy
Running this command creates:
A CloudFormation stack
EC2 Image Builder components and image recipe
An EC2 Image Builder pipeline for repeatable and automated AMI builds
A prompt will appear requesting permission to deploy these resources.
Running the Image Builder Pipeline#
Once the deployment completes, retrieve the EC2 Image Builder pipeline’s ARN:
Open the AWS EC2 Console in a browser
In the search bar, type
EC2 Image Builderand click on itClick on the link for the deployed pipeline’s name
Next, use the Pipeline ARN on that page to run the pipeline from the
CLI:
$ aws imagebuilder start-image-pipeline-execution --image-pipeline-arn <image_builder_arn_from_image_pipelines_page_in_ec2_console>
{
    "requestId": "01234567-0123-0123-0123-012345678901",
    "clientToken": "01234567-0123-0123-0123-012345678901",
    "imageBuildVersionArn": "arn:aws:imagebuilder:us-east-1:<deploying-aws-account-number>:image/<pipeline-identifier>/<Maj.Min.Pat/Iteration #>"
}
The combined command
cdk deploy && aws imagebuilder start-image-pipeline-execution is
very effective for making sure that the EC2 Image Builder pipeline runs
the moment deployment completes, reducing iteration time.
To run the pipeline via the EC2 Console, refer back to the steps directly above, then do the following:
On the
Actionsdropdown menu, selectRun pipelineView the log stream provided for that build session
The CloudWatch log stream may be inspected from the EC2 Image Builder pipeline visited in the steps above. This provides a near-real-time view of the runtime AMI build’s progress, as well as any errors it may encounter. A successful runtime AMI build using all of the components mentioned in this guide takes ~45 minutes. Once the runtime AMI has been built successfully, it is available for immediate use by the deploying account and all others it was shared with across all specified regions.
Cleaning Up Resources#
To delete the CloudFormation stack, EC2 Image Builder pipeline, and all of its components, run:
cdk destroy
This also allows starting over from version 1.0.0 when deploying a pipeline with the same name again.
Creating Custom Components#
If an application has a dependency that is not covered by the provided
components, a custom component can be created to install that dependency
or perform any other setup needed. The components are defined in the
table called COMPONENTS in
lib/components.ts. Each component has 3 parts:
a name, a header, and cmds. These are the only values needed
to define a new component. Components’ commands are able to use
TypeScript’s template strings to substitute variables into them.
A component’s commands are executed as bash commands during the AMI build. The EC2 Image Builder service may fail due to undefined variables when it’s executing the Bash commands in a component. The EC2 Image Builder service requires all variables to be defined before being accessed to ensure reliable and reproducible builds. This is why variables are explicitly defined in the included component definitions and installer scripts.
Once the component has been created, add it to the componentConfigs
list in lib/runtimeAmiBuilder.ts for
use in the runtime AMI build.
Issues/Support#
-
A code bug is found
A failure not due to the use of IAM roles or the AWS CDK itself is encountered
-
An issue with IAM roles, the AWS CDK, EC2 Image Builder, or CloudFormation has occurred
FAQ#
It looks like the XVC PCIe driver isn’t there after being installed in the pipeline. What should I do?
Run
sudo modprobe xilinx_xvc_pci_driverto start the driver for the current session